Browsing Category

Cleaning

3 Must-Do Cleaning Projects To Do This Summer

Please note, this post is sponsored by Diamond Bloggers. All opinions expressed are my own, thank you.

With a new warm-weather season at hand, it’s time to conquer those deep-cleaning chores, both indoors and out, that help you and your family enjoy a clean and comfortable home this coming warm weather season.

Personally, I love seasonal cleaning- it helps me prepare my outdoor spaces in a non-chaotic, orderly, and somewhat fun manner. And what better way to usher in the upcoming fall season than a clean, orderly home?

With this in mind, I want to share with you all how I break down my own season chores as part of my Seasonal Cleaning Checklist. A list to help you get your home in its healthiest shape before the summer starts. But even with Summer now upon us, there’s still plenty of time to get these healthful cleaning hacks underway. Here’s how to get started:

Summer Maintenance

I also like to perform a general outdoor maintenance checklist to include making sure the caulking around windows and doors is in proper order and inspect external doors and garage doors for gaps that can cause drafts. I also like to make sure the exterior windows are cleaned and, weather permitting, touching-up paint as needed.

Another area of measure includes cleaning gutters and making sure to examine and repair exterior spigots as needed. There’s also flooring for homes like my own that contain commercial flooring, including lvt tile. Finally, make sure to clean out birdhouses and feeders. Then purchase new feed accordingly.

photo of cone pattern

Roofs

One of the lessons I learned first and foremost as a homeowner was to maintain the integrity and value of my home by valuing my home’s roof. Maintaining your roof allows you to maintain the beauty of your home’s exterior, maximize and protect your dwellings investment, help prevent health issues within your home, and save money over time preventing higher energy bills at home.

All of which start with a clean, properly maintained roof at home! And for homeowners who are seeking a more singular less weekend warrior approach to roof maintenance this season, then you should definitely look into seasonal roofing services before the official start to winter this season.

With professional roof servicing being typically quoted by the square foot and tile type. However, the size of the job, roof pitch, landscaping, and overall severity of the stains are also factors that can influence the overall cost. Costs as necessary as they are affordable to most homeowners at home.

Let’s also not forget how slippery leaves can be after spring rains. Why risk the potential hazards of slips and falls when you can trust the care of one of your home’s best lines of defense with professionals? After all, the upfront costs of having your roof professionally cleared and cleaned, along with gutter cleaning services, can help maintain the value of your home. Which will help, later on, prevent costly repairs later in the year?

Decks and Patios

Springtime has us all longing for those beautiful backyard get-togethers, barbecues and times spent running through the sprinkler. But before you start sending out the invitations to your first warm-weather bash of the year, you will want to thoroughly spring clean your decks and patios to get them entertainment ready.

Starting with giving your outdoor spaces a proper sweep to remove any remaining leaves from the fall, and removing any debris that has made its way to your outdoor spaces before returning planters or adding additional greenery and annuals to your planters this season.

It’s also a great idea to powerwash the entire deck or patio to help break up and tackle any stains or oily spots on your common outdoor surfaces. Using a stiff broom or scrub brush, can help remove stains. This is also a great time to replace any planks and flooring beyond basic repair. Including dock products from Decks & Docks Lumber Company.

Follow these repairs by cleaning off your outdoor patio furniture by removing any cushions or textiles from the furniture and wash them according to their specific directions. Making sure to wipe down the furniture to remove any excess dirt and debris. Replace any furniture or cushions that are unable to be cleaned or broken. And the best accessory for a newly power-washed deck or patio area? New patio furniture, of course. Shopping for new patio furniture? Here’s a guide to help you purchase the best patio furniture for your home this season

The season for outdoor entertaining is upon us, celebrate with a beautifully clean patio or deck, but with a few simple outdoor Spring cleaning sessions, your outdoor entertaining spaces will be entertainment ready long before warm weather season hits!

Friends, those are the three seasonal chores you should be attending to at home before the start of Spring this month. Now I want to ask, what are seasonal chores you are currently undertaking at home to prep your home this fall? Share your thoughts below!

How to keep your kitchen clean and smelling fresh

two clear glass jars on brown wooden floating shelf

It can be challenging to keep your kitchen clean and smelling fresh. Follow these tips to help and you will notice a difference.

Let Air In

Air can get stale quickly, especially if the food smell is lingering. Make sure you keep fresh air coming in by opening the windows. Use some potpourri around the kitchen for a beautiful floral fragrance.

Counter Tops

Keep your countertops clean and crumb-free by cleaning after each use. Crumbs have a habit of getting behind appliances such as toasters and microwaves, so pull these out and clean behind them regularly. White vinegar will clean your countertops well, but an online cleaning and medical supply store can provide you with fresh smelling cleaning products too.

Bin

Empty your bin regularly to get rid of bad smells, but make sure you clean it out too. A spray of disinfectant and a wipe around the base and sides will neutralize any odors that have been left behind.

Fridge

Your fridge can smell bad and become unpleasant if you have left food to go off in there. Use airtight containers to keep your food fresh for longer and make sure you clear your fridge out regularly to stop food from going off and turning moldy. Remember to clean your fridge shelves and trays regularly too as this will prevent bad odors from lingering.

Dishwasher

Keep your dishwasher clean and odor-free by using a dishwasher cleaner and rinsing well. Check your dishwasher filter regularly too as food can become caught in the filter and make your dishwasher smell bad. This will also prolong the life of your appliance.

Washing Machine

Check the filter and around the rim of your washing machine regularly. Also, it can help to put on an empty cycle occasionally as this will keep your washing machine odor-free and running smoothly. Don’t forget to wipe down the front of your kitchen appliances regularly to keep them looking pristine.

Cooker

Use an oven cleaner to keep your cooker fresh and smelling lovely. Don’t forget to clean the filter on the chimney hood too as grease can collect here and create bad odors. Wipe the hob after each use to prevent spills and crumbs from building up.

Floor

Use a clean and sweet-smelling broom and mop on your floor regularly. Mops can start to smell if they are not changed regularly and cleaned, so don’t forget this important part of floor hygiene. Crumbs can collect underneath appliances too, so pull these out regularly and clean around and behind them to stop crumbs building up and creating odors.

Dish Cloths and Tea Towels

These are a breeding ground for bacteria as they are usually kept warm and damp. Make sure you wash them regularly or buy disposable ones so that they can be changed often. A lot of bad odours in the kitchen can be traced back to these items.

Use these tips for a pristine and sweet-smelling kitchen.

7 Must-Do Chores This Winter At Home

While the majority of cleaning gurus will lay claim to the idea that when it comes to cleaning, spring is the time when the vast majority of your household chores should be completed. The truth is wintertime, with all its environmental muck, the mud and dirt brought in from the outside, the soot of the fireplace, and less-than-ideal indoor air. All of which makes cleaning in winter just as important as any other season.

So with this in mind, here are 7 cleaning chores you should be doing this winter to keep your home in its healthiest and cleanest shape:

brown wooden surface

Protect your floors:

To keep as much dirt and mud outside of your house as possible, place mats at all entry points. This will encourage people to rub the mud off their shoes using your mat, and not your carpets! Placing mats inside the house can also help reduce indoor dampness.

Performing regular vacuuming sessions, twice weekly at a minimum, can help to get rid of dirt on the floor and things being trucked in as well. It’s also a good idea to have a different pair of house shoes or slippers for each member of your household to wear while indoors.

This will help keep your floors from marring and prevent foot oils from transferring to newly cleaned floors. A Tip: Placing a boot tray, filled with river rocks, by each entrance will encourage others to remove their soiled, stained, soaked boots before coming further into your home.

two brown spray bottles on brown table

Cleaning your home more often:

During the winter season, people spend most of their time indoors, so it’s best to maintain the cleanliness of the home daily rather than weekly. Maintenance is especially important when you have children and pets at home as they love to play both outdoors and indoors, making it essential that you regularly sanitize countertops, wipe out bathroom sinks, and sweep and mop high-traffic areas with disinfectants such as white vinegar with a few drops of organic citrus essential oils each day.

yellow knitted bag

Carpet cleaning even in winter:

Having your carpet thoroughly cleaned helps protect your health. While everyone wants clean and beautiful carpeting in their home, they also should want a carpet that is not saturated with the chemicals common in ice melt and from rubber boots. Helping to remove this dirt building up, by sprinkling your carpet with baking soda, and vacuuming up the debris, will help to refresh your home and health!

air tight jars

Perform a pantry audit:

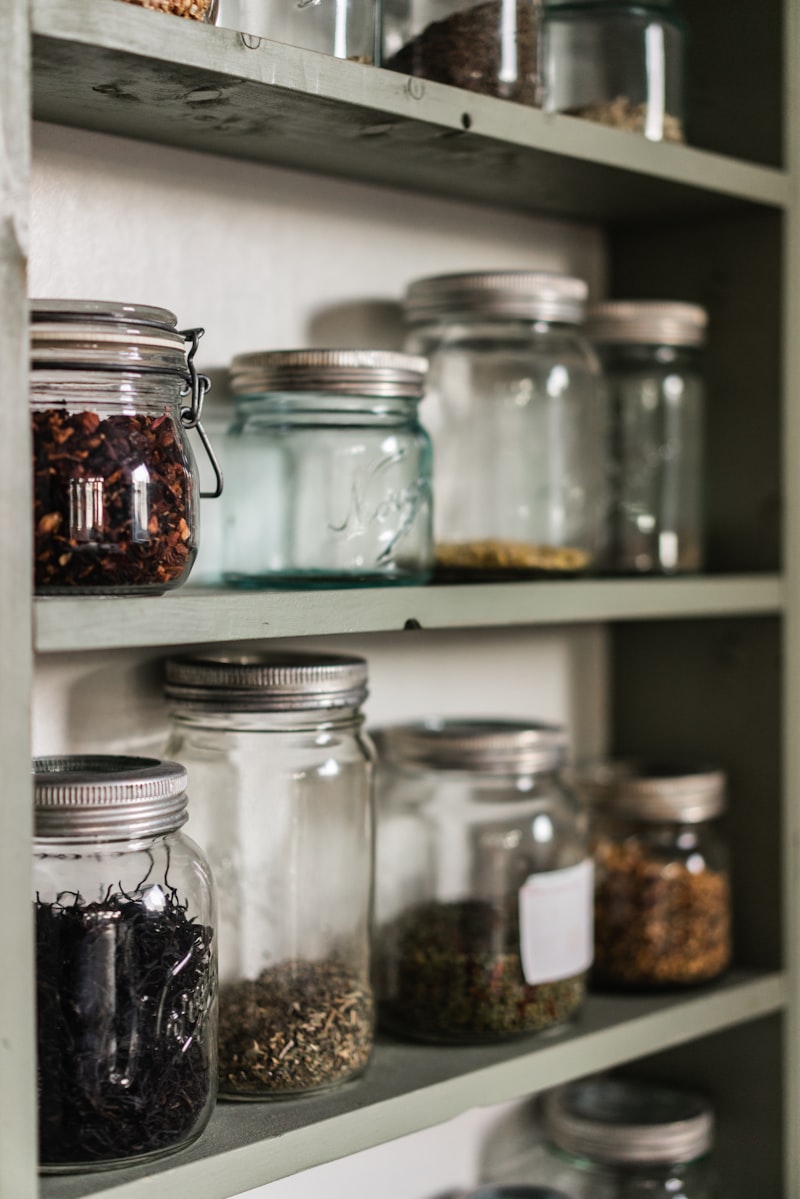
Start by removing all the cans and boxes from your pantry and storage shelves, and then vacuum away any lingering dust or crumbs that may have accumulated since spring. Then, inspect each item before putting it back in its place, tossing anything that is expired in compost, and donating anything you will not use within the next two seasons to a local food bank. You may be surprised at all of the soup-building staples you may already have on hand at home.

Test and clean your smoke detectors:

You already know to put fresh batteries in your smoke alarms and carbon monoxide detectors on the days you change the clocks for Daylight Saving Time, but you also need to clean your units as well. Since dust accumulates on each unit, it can cause them to underperform. Use your vacuum cleaner’s soft brush attachment to clean in and around the detectors’ openings, and if any are more than 10 years old, replace them.

white bed by the window during daytime

Flip your mattress:

When you turn back your clocks, you should turn your mattress over, too. But I also recommend rotating pillowtop mattresses a full 180 degrees to prevent body impressions from causing certain spots to slump. Also, sprinkle your mattress with baking soda to neutralize odors, and then vacuum it up monthly.

white and black device

Vacuum all upholstered surfaces:

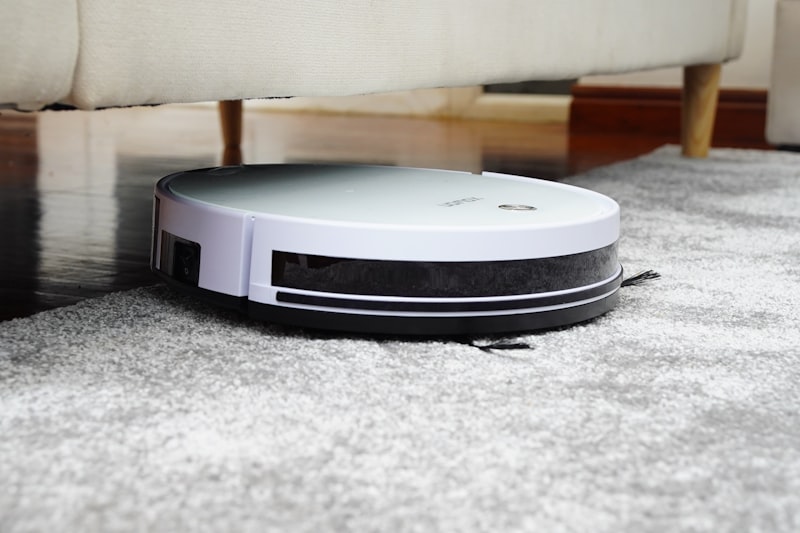
You think your couch is clean until you plop on it, and a haze of dust appears around you. Give sofas and chairs a good vacuuming, making sure to hit both sides of the cushions, the back, sides, arms, and even the platform underneath the cushions.

Don’t forget the exterior of your home after your 7 chores:

While interior upgrades should take priority, it’s also important not to overlook exterior projects. Start by clearing out gutters to protect against water damage and ensure proper drainage. Your foundation should be clear of debris to reduce pest infestation and water damage. Power washing the siding, deck, and patio will remove mildew, grime, or accumulated dirt over the seasons. Additionally, inspect the exterior walls, windows, and doors for cracks that might allow drafts or moisture in. Furthermore, examine your roof to look for missing or damaged shingles that might require repair. Hire a roofer if needed to make necessary repairs. Trim any overgrown bushes or trees near your home that could provide access for pests, as they could provide entry points for them and cause exterior damage. Don’t neglect to give some attention to the exterior during winter cleaning.

So, friends, those are the 7 Must-Do Chores To Do This Winter. Chores that will help to keep your home in tip-top, healthy shape. So now I have to ask, do you have any chores that you perform at home to help keep your home healthiest each winter? Please leave your thoughts in the comments below.

Fall Zone Cleaning List: Everything You Should Be Cleaning This Season!

Please note: This post contains personal affiliate links. All opinions expressed are my own. Thank you.


Fall Zone Cleaning List


With Autumn just around the corner, it’s time to conquer those end of season deep-cleaning chores that help you and your family enjoy a clean and comfortable home this winter.

Personally, I love seasonal cleaning- it helps me prepare for the upcoming holiday season in a non-chaotic, orderly, and somewhat fun manner. And what better way to usher in the upcoming fall season than a clean, orderly home?

With this in mind, I want to share with you all how I break down my own season chores as part of my Fall Cleaning Chore Checklist. A list to help you get your home in its healthiest shape before the winter season ahead. Here’s how to get started:

Fall Zone Cleaning List

Patio

  • Clean and store patio furniture, umbrellas, kid’s summer toys.
  • If you own a pool: Drain the pool, if applicable. Close it up for the year.

Winterizing Maintenance

  • Check caulk around windows and doors.
  • Inspect external doors and garage doors for gaps which can cause drafts.
  • Wash exterior windows.
  • Check outdoor trim and touch-up paint as needed.
  • Install insulating covers on exterior spigots.
  • Check outdoor trim and touch-up paint as needed.
  • Clean out outdoor lighting. Replace bulbs as needed.
  • Check gutters and downspouts.
  • Have chimneys and flues inspected and cleaned if necessary.
  • Check chimneys for cracks and replenish lava stones accordingly.
  • Check fire pits for rust or damage. Make sure winterized cover is available.
  • Clean out birdhouses and feeders. Then purchase new feed accordingly.
  • Stock-up on fire starters, kindling, and chopped wood.

Shed & Garage

  • Inspect external doors and garage doors for gaps which can cause drafts.
  • Wash exterior windows.
  • Drain and store all garden hoses.
  • Store flower pots; plastic pots will need to be cleaned, emptied, bleached, and air-dried.
  • Terracotta pots should be sun-sanitized, stacked, and stored on their sides.
  • Sew grass seeds, as needed.
  • Service snow blower, power washers, lawnmowers, and leaf mulchers.

Fall Zone Cleaning List

Windows

  • Wash all windows with glass cleaner and wipe down with a microfiber cloth.
  • A handy tip? Clean windows on a cloudy day so you can better see any streaks left while cleaning.

Vacuuming

  • Vacuum all canvas, cotton, upholstery, and fabric blinds with a low setting and a brush attachment.
  • Vacuum and spot clean upholstered furniture and cushions.
  • Vacuum baseboards and corners well.
  • Clean out and vacuum vents.

Dusting

  • Vinyl shades can be wiped down with a dampened microfiber cloth.
  • Dust, wash, rinse, and dry painted or wood-paneled walls.
  • Clean ceiling-mounted light fixtures.
  • Dust your electronics. Start with your CPUs, handheld devices, and phones. Make sure to clean and wipe down the keyboard, and dust off the monitor with a microfiber cloth.

Surfaces

  • Wipe down the kitchen cupboards.
  • Dust off the refrigerator condenser coil.
  • Look at your wooden floors. Fill scratches.
  • Wash down walls with a mild astringent or cleaner, and dry with a dust mop.

Decluttering

  • Spruce up your computer. Defrag and recycle all unused files.
  • Straighten up your closets.
  • Create a capsule wardrobe.
  • Clear kitchen counters of all appliances not used within the last week. Donate as needed.
  • Organize kitchen cabinets, paying particular attention to baking supplies, pans, and equipment.
  • Straighten-up the linen closet. Air out and declutter blankets, down comforters, and flannel sheets.

Seasonal maintenance

  • Test smoke and carbon monoxide detectors.
  • Replace the furnace filter.
  • Turn mattresses to equalize wear.
  • Launder or clean all bedding: mattress pads, pillows, duvets, blankets, comforters.
  • Clean all humidifiers, dehumidifiers, and diffusers.
  • Drain sediment from hot water heaters.
  • Thoroughly clean pet items including litter boxes, fountains, dishes, crates, and crate pads.

Allergy-Preventing Chores

  • Clean blades of ceiling fans.
  • Sort and clean any extra zones such as linen closets, utility closets, and office spaces.
  • Be sure to use bathroom fans and clean up any standing water immediately.
  • Scrub any visible mold from surfaces with detergent and water, and completely dry.
  • Keep your home humidity levels at or around sixty percent.
  • Remove pet allergens by vacuuming frequently and washing upholstery, including your pet’s bed.
  • Stock-up on essential oils that help fight allergies including sweet orange oil and tea tree oil.

Fall Zone Cleaning List

Each fall season I like to stock my home with rich spices, fresh produce, including sweet potatoes, butternut squash, and cranberries, along with comfort classics like evening tea and ginger root. But before I can take to the streets, I take time to properly storing stockpile items, including:

Canned goods

Canned goods cannot be allowed to freeze. When canned goods freeze, they stand the chance of cans bulging, which can cause the seam and lid failure, which can cause food-borne illnesses, not to mention to fail, changes in product texture, flavor, nutrient factors, and product color. Most canned goods are packed in a solution of salt or sugar, which lowers their freezing point, but canned goods should not be stored below 32 degrees Fahrenheit. Before temperatures freeze, this season, move canned food indoors.

Soft Drinks, Cooking Oils, and Cleaners

Freezing can have adverse effects on liquids such as soda, cooking oil, soap or detergent. Basements are a great place to store these goods. Frozen detergents and cooking oils can be brought back to room temperature by placing them in trash bags, at room temperature, and then storing accordingly.

Dried Foods

Foods that are dehydrated or freeze-dried will actually last longer in the cold since there is no water in them to freeze or can be frozen in deep freezes. I like to use my food saver’s canning jar attachment to suck out the air and help preserve my food for the entire winter season ahead. Foods like flour and seeds are stored in the deep freezer in mason jars.

Produce

Some products such as potatoes, sweet potatoes, and apples will actually keep longer stored in bins in cooler climates or sheds. If you use this method, be sure to check produce weekly, and with any sign of aging, the produce should be composed immediately. This is especially true for potatoes, which can emit deadly gasses if left to rot for several months.

Fall Zone Cleaning List

Keep in mind, deep cleaning your home from top to bottom will essentially take several days. Do not attempt to clean your entire home in a day, or a weekend for that matter. Take a week, break off chores into chunks, utilize your family for aid and resource, and give yourself the grace of time and consideration of your everyday life when completing this expansive list. You can get a head start by changing your air filters every three months and using filters with a MERV rating of 11 or 12.

My biggest tip? Be sure to vacuum regularly to get rid of dust mites. Use a cyclonic vacuum, one which spins dust and dirt away from the floor, or a vacuum with a HEPA (high-efficiency particulate air) filter. And as always, be sure to wash bedding and stuffed animals weekly.

Moreover, consider this when devising a fall cleaning schedule:

  • Are you the kind of person who wants to do a little every day?
  • Would you rather tackle it all at once so that you don’t have to think about it for the rest of the week?
  •  Do you work full time or are you home during the day?
  • Do you have young children at home whose chores can be incorporated into this system?

As there is no one “right way” to keep house, and so no universal cleaning schedule that will fit every household’s needs. It’s just about being mindful that for the next few months ahead is the long-term goals, so by adding a few small, obtainable cleaning goals each day is the way to go! This is a challenge to make your home as healthy as it is steadfast this coming season.

Friends, do you have any tried and true methods for cleaning around your home this time of year! I’d love to hear about them below!

Fall Zone Cleaning List

How to Make DIY Dryer Balls


How to Make DIY Dryer Balls

The dryer. A source of heat in an already hot home. For me, the quicker I am done with laundry the better I feel about my day. It also goes without saying that in order for my laundry sessions to feel complete, they need to be as low-energy and zero-waste as possible too! I mean sometimes using energy star appliances and eco-friendly detergents just aren’t enough when it comes to the laundry at home. Sometimes you just need a quick DIY to get you further down the road. Which is why I wanted to share with you one of the ways I have found to save on my household laundry bill and that is with making DIY Dryer Balls!

It’s best to start by saying that at least half of my household laundry is air-dried, as this is my preferred method. However as I live in the deep south, and the farther the mercury rises in my thermometer, the longer air drying takes in my area due to humidity, this is always not an option. In comes, our electric dryer! I have found that I can save upwards of half my previous drying times by using dryer balls with each load of laundry at home!

How does this work, you ask? Well, by using dryer balls one can improve your dryer’s efficiency and life span by half,  by reducing the time required for wet clothes to dry. As the dryer spins, these balls tumble between the clothes, maximizing the wet clothes’ contact with the warm air pockets they create. Effectively, dryer balls ‘fluff’ your clothes as they spin, speeding up the drying process and eliminating the need for fabric softening dryer sheets.

Also, as many of you may know, dryer balls are not a new concept. People have been making them for years as an eco-friendly alternative to dryer sheets and liquid fabric softener. But the greater picture tells us, that these DIY, eco-friendly marvels,  can do so much more than just eliminate chemicals from your laundry, here’s how:

What are the benefits of using wool balls in your dryer?

  • They decrease drying time, saving you money on utility bills; by as much as 1/2 during the colder, winter months!
  • Dryer balls are chemical-free! Commercial fabric softeners and dryer sheets are filled with harmful chemicals and perfumes that coat your clothing, including PABA, which inevitably will end up on your skin.
  • Commercial dryer sheets can be costly, costing as much as $$0.13 per sheet, which is like throwing money away! Wool dryer balls can be re-used for years, saving you hundreds of dollars.
  • Commercial fabric softeners shouldn’t be used on cloth diapers. Wool dryer balls are perfect for keeping your cloth diapers soft and are again, chemical-free.
  • Wool dryer balls won’t affect the absorbency of your towels, kitchen cloths, or cloth diapers – commercial softeners will.
  • Dryer balls increase fluffiness for home linens and towels and reduce static as dryer loads tumble, per load.
  • Dryer balls help to soften clothes naturally.
  • Dryer balls are made from a renewable resource.
  • Dryer balls cost under $1.00 each to make!

How do they work?

Dryer balls work, as they bounce around in the dryer separating clothes, allowing more hot air to circulate through all the garments. As they tumble, the wool balls fluff your laundry, reduce wrinkles, making for softer laundry. They also act as a moisture wick, and pull moisture out of clothes, and will save you up to 1/3 your drying time. Why should this matter? By saving 1/3 of your drying time you will save up to $0.50 per load on your electric bill!  Here’s how to make your own!

Materials:

  • A skein of 100% wool yarn. Not superwash or machine washable varieties. (Here’s my favorite yarn to use)
  • Scissors
  • Pantyhose
  • Crochet hook
  • String or cotton/acrylic yarn
  • Essential oils.

How to make Dryer Balls:

  1. Choosing Your Yarn: Choose skeins of yarn that are 100% wool; stay away from skeins labeled superwash or machine washable,  as these skeins will not felt. You can even cut up wool sweaters, too. Also, you can choose any colors you wish, as felted wool does not bleed into washing or dryer loads.
  2. Create balls: Ball up your yarn, just as you would for knitting, or for a cat ball. Balls should be the size of a tennis fall; aim for 4″ balls.  Repeat this step until you have 4-6 balls.
  3. Tucking: Use a blunt-tipped yarn needle or crochet hook to tuck the end of the thread under several layers of yarn. Pull it through and cut the end.
  4. Prepping: Cut the leg off an old pair of pantyhose. Put balls into the toe of the pantyhose, tying tightly in between each ball with string, or cotton/acrylic yarn; make sure not to use wool yarn or it will felt around the pantyhose. Tie off the end when you have 4-6 segments. Your segments will look like a caterpillar.
  5. Felting the Dryer Balls:  Throw the entire yarn caterpillar into the wash with towels.
  6. Wash: Wash in a hot wash cycle with a cold water rinse cycle, and then. dry your yarn caterpillar with your laundry using the hottest dryer setting; repeat for three settings. You will know your balls have felted when a finger run across the balls does not create pills.

Now that you have created dryer balls, just toss 2-3 balls in the dryer with your freshly washed clothes, and let them do their work; I add 4-6 drops of essential oil on balls going to the dryer in lieu of fabric softener sheets! For larger loads of clothes, linens, or any load with denim, use at least 4-6 balls to notice a decrease in drying time. For large loads, or any HE super-size washers, 6-8 will be needed. The more balls you use, the more quickly your clothes will dry. I like to store your dryer balls in the dryer between uses or display them in a basket in your laundry room.  Also consider making baskets of dryer balls for college graduates, for housewarming gifts, or for hostess gifts, too!

In the last three months of using my dryer balls, I have noticed that my clothes dry 1.3 faster, and my overall electric bill has decreased by $4.10, on average, per month; this is a projected saving of $36.00 a year!

So, folks, this is how I make my own dryer balls. Truly one of the most cost-effective and least time-consuming zero-waste swaps I’ve made in my home to date (you can check out other zero-waste swaps we’ve made here). So now I have to ask, are you using wool dryer balls or do you have other means for saving time on your drying bill at home each month? If so, please be sure to leave me a comment. I’d love to hear about your DIY experiences with them!

DIY Wooden Furniture Balm!

icecream (1)

Hello again, savvy savers! Today finds us with a new Thrifty Thursday Post, and today it’s my recipe for DIY Wood Balm! This is my go-to recipe for cleaning, prepping, and conditioning my kitchen cabinets, cutting boards, salad bowls, and storage containers! I make my blend for under $3.00, which lasts for over a year at a stint.

Here’s how to make it:

Ingredients: 

  • 2 Tablespoons of Olive Oil
  • 2 Tablespoons Mineral Oil
  • 20 Drops Essential Lemon Oil
  • 8 Ounces Beeswax

How to make this Balm:

  1. Meltdown 8 ounces of pure, natural unscented beeswax in a double boiler, lined crockpot or cleaned out wax warmer.
  2. Pour your wax into small, clean glass jelly jars, or any small container with a wide brim jar mouth.
  3. While the wax is warm add your olive oil and essential oils.
  4. Stir the wax blend for ten seconds.
  5. Allow the blend to sit, meld, and solidify for one hour.

So, that’s it! This blend is natural, economical, and with a small amount on a clean, white cloth you will be able to clean and condition all of your wooden kitchen items within minutes. I condition my kitchen cutting boards quarterly, and kitchen cabinets annually!

Here’s to saving,

mbnlogosm


DIY Natural Bleach Alternative

DIY Natural Bleach Alternative

Since being diagnosed with PCOS and with an MTHFR-gene mutation three years ago, one of my missions in life has been to rid my home of necessary chemicals and toxins. While this may seem like a relatively simple process, but as I’ve transitioned to fully working from my home office I’ve stopped seeing cleaning as a series of weekend cleaning marathons and now more a daily stream of necessitated chores and routine maintenance that requires cleaners, tools, and a litany of products to be kept on hand at home.

With having health issues I’ve been at odds over which cleaners to buy. Should one go with tried-and-true cleaners or making products that may or may not work for our family’s needs? I’ve truly anguished over whether or not what I believed to be the best way to clean my home was correct, as most of what I know about cleaning and home care came from my Grandmother. All of which makes buying cleaners, solvents, and detergents more and more difficult.

One of my most difficult quandaries? Chlorine bleach. Growing up I cannot tell you the number of times I remember my Grandmother pulled out her trusty jug of bleach. From cleaning counters to laundry to even adding a capful of bleach to hand washed dishes, bleach was a staple in our home. My issue? Bleach causes me skin allergies, induced asthma symptoms, and makes my eyes water horribly. As a result, I stopped buying bleach.

But while my bleach allergies stopped the need to not have dingy, grayish laundry did not cease to be a need or concern in our home. Which led me to rethink my ban on bleach. Except, this time I needed to find an affordable, lasting bleach alternative. Particularly a natural, homemade alternative that brightens your clothes, smells good and doesn’t irritate my skin. A tall order indeed.

So I began with a little research to find the right natural bleach. I started working  with the following commonly known brighteners to find a viable at-home solution:

  • hydrogen peroxide
  • lemon juice
  • baking soda
  • vinegar
  • citric acid
  • lemon essential oil

While all of the items above will whiten and brighten clothes, not all of these products can be used together. For example, mixing vinegar and hydrogen peroxide creates peracetic acid, an acid which can be incredibly irritating to the skin, eyes, and nasal passages. So to avoid allergic reactions while cleaning, I eliminated vinegar off my list.

So using the remaining ingredients and after numerous rounds of washing our reusable kitchen cleaning clothes, I’ve come up with a combination that gets the job done and is very affordable! Here’s how to make it:

Ingredients:

  • 3/4 cup Hydrogen Peroxide
  • 1/4 Cup Lemon Juice
  • 15 Drops Lemon Essential Oil
  • 3/4 Cup Baking Soda
  • 7 Cups Water
  • 1 Teaspoon Citric Acid
  • 1/2 Gallon Mason Jar

Method:

  1. Combine all ingredients in a container.
  2. Shake blend well before each use.
  3. Use 1 cup per load, washing with hottest water setting available.

A few final thoughts:

While some other DIY recipes for bleach alternatives call for equal parts hydrogen peroxide and lemon juice, I thought that it would be a tad expensive with so much lemon juice. The 3:1 ratio I went with, in conjunction with the jugs of lemon juice I can purchase from Sam’s Club for a song, is enough to get the job done and keeps costs affordable.

As well, as a rule, hydrogen peroxide should be kept in a cool place and preferably in a dark bottle, and as should this blend. The water you add can be plain tap water. No need to use filtered water when it’s only going to be combined with tap water in the washer anyway.

Also, the water you add can be plain tap water as there will not be a  need to use filtered water when it’s only going to be combined with tap water in the washer anyway.

Now if you have ultra dirty clothes you might want to soak dirty clothes and solution in the washer overnight and then add detergent and finish cleaning cycle in the morning. Another tip is to wash dirty clothes twice in a row before drying, and of course, to wash in hot water to help make your laundry it’s lightest and brightest.

Cost breakdown for this blend:

  • Hydrogen Peroxide: $0.07
  • Lemon Juice: $0.18
  • Lemon Essential Oil: $0.18
  • Baking soda: $0.11
  • Citric Acid: $0.09
  • Total cost for 1/2 gallon all-natural homemade bleach alternative: is just 63¢!
  • This is an 89% savings over conventional bleach alternative products!

As the cost for store-bought bleach at Costco and Sam’s Club averages about 3 cents per ounce, but this homemade version costs just 0.5 cents per ounce, so you’re not only saving money but harmful chemicals from your home and laundry, too!

So, everyone, I have to ask, do you use bleach or are you more into the bleach alternative camp? I’d love to hear your opinions below!


DIY Natural Bleach Alternative