Monthly Archives:

August 2015

August No Spend Month Challenge Day 20: How To Sell On ETSY!

Day 20-


Hello again, savvy savers! I hope you all are well rested, and ready for a new daily challenge! So today I want to focus not on selling things gleaned from your home, but items that can be made from items you have on hand. I am speaking of ETSY.

Today, I would like you all to consider all of the homemade crafts, recipes, items, and crafts that you have a knack for making, can easily make from the items you have on hand at home, or items that can be made quickly! Are you a painter, knitter, crafter, good at wood working? Can you make candles, wax melts, or boot cuffs? Then my friend, this is the post for you! As today I want you all to consider opening up an ETSY Shop.

So, why ETSY? 

  1. If you’re an artist, jeweler, soap maker, knitter, baker, or you simply have a house full of vintage items, then you might be in a perfect position to start your own business on Etsy.
  2.  Etsy is an online marketplace designed exclusively for people selling handmade and vintage items.
  3. The site allows people from all over the world to sell their homemade goods, and anyone, from stay at home moms to well-respected gallery artists, to have an open market to sell their work.
  4. Currently, Etsy has over 400,000 sellers, 7.7 million listed items for sale, and over 7 million customers. In 2010, the site sold more than $300 million worth of goods. 
  5. Etsy is egalitarian in nature. This is not simply a place to make a quick buck, but a place where anyone can create a home business, where sales can range from simple, passive income, to massive, evolving sales platforms, depends on your schedule! 

What Can I sell:

  • Crocheted items
  • Soap, lotions and candles
  • Handmade clothing
  • Jewelry
  • Paintings
  • drawings,
  • sculpture
  • Handmade furniture
  • Books and magazines
  • Vintage items (20 years or older)
  • Quilts
  • Bags and purses
  • Baked goods such as cookies, cupcakes, bread, jam, etc.
  • Yarn and other supplies catering to the handmade/crafting crowd
  • Blown glass
  • Handmade paper items
  • Upcycled goods
  • Nearly anything! 

How to Sell:

  1. You should first start by figuring out what you will create and sell.
  2. Next inventory what supplies you have on hand to create your products.
  3. Setting up a Seller Account on Etsy is an easy, two-step process.
  4. First, you’ll need to have a Paypal account, and a valid credit card. 
  5. Next you need to enter your billing information. You will need a valid credit card so Etsy can verify your identity.
  6. You’re now an official Etsy seller.
  7. Setting up your shop is going to take more time. You can create a customer banner for your Etsy store, and you’ll want to upload a picture or logo so customers can put a face or image with your shop.
  8. Next create a prototype of several items.
  9. Next,  you’ll also need to photograph all your items, and create a listing for each one. You’ll also need to insert “tags,” or keywords, that will help customers find your items.
  10. Cross list items; For instance, imagine you’ve just listed a turquoise necklace. You would use tags such as “necklace”, “turquoise necklace”, and “blue”, all which will help your item get noticed when customers search for those specifics.
  11. Pay for your listings.
  12. When items sell, be sure to quickly ship, usually within a business week, and mail all parcels withsignature confirmation delivery. 
  13. Payments will be added to your sellers account within 48 hours of payment clearing.
  14. All listings will need to be renewed seasonally!
  15. You’re now a seller! 

Sellers Tips:

  • Fees are charged per sale; a flat 3.5% fee will be added to your sellers account only if an item sells.
  • Fees are refunded on returned items.
  • Be sure to create a clearly expresses return and shipping policy.
  • Be sure to create a detailed customization policy, if you plan to allow changes be made, per order.
  • Consider changing stock seasonally.
  • As your store grows, your sellers account ceiling will grow accordingly; the larger the shop the more charges can be added to your account.
  • All account fees are due the first business day of each month.
  • You can charge shipping costs to your account, up to your limited account cap.
  • Account caps are evaluated and adjusted bi-annually in July and December; you are emailed if your account cap changes.
  • Be sure to create an email account to go with your shop name; i.e. etsyshoptobenamed@gmail.com.
  • Always use USPS’s Media Mail option, for shipping heavy books.
  • Be sure to create a Facebook fan page, to advertise your goods.
  • You can create in-app ETSY coupons for customers; be sure to include a thank you card with your coupon code enclosed with each order to promote return business.
  • One week after delivery, you can politely ask buyers to leave you ship feedback.
  • Never list orders for items that you cannot fulfill or have stock to prepare! 

Support:

  • One of the most amazing aspects of Etsy is the amount of support and the sense of community you get through the site.
  • Etsy has a lot of helpful tutorials to help sellers get more exposure and earn more money.
  • The forums are extensive and Etsy’s thousands of sellers will help answer any question you have about setting up your shop.

So today I challenge you to sell items on ETSY! Moreover, do you already sell on ETSY? What has your experience been like? Leave a comment and let me know your thoughts! Be sure to come back this evening to see how my daily challenge went, as well as how I was able to additionally save around my home!


Untitledj


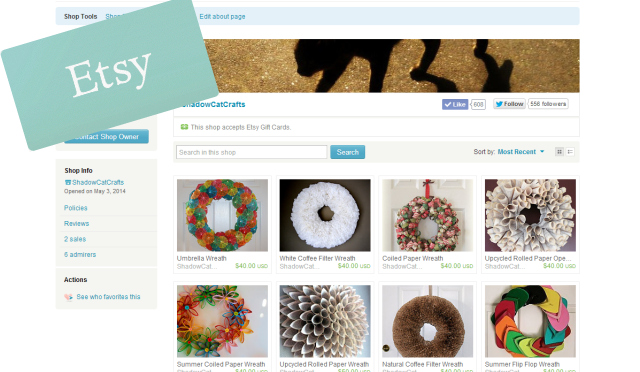
As an ETSY shop owner myself, I am partial to this site, and hope that you all could consider this site! It’s beyond awesome! Please feel free to check out my shop, here!  As for me, as I already have a seasoned account, so I listed ten new seasonal items for sale; items for Saint Patrick’s Day, Easter, Spring, Mother’s Day, and Cinco de Mayo.

My Selling Goals Were:

  • I am going to list 10 seasonal items. 
  • All items will be listed for one season.
  • The items cost $2.00 to list, which was paid with funds from iBotta, in my paypal account. 

As well today I was also able to accomplish:

  1. As part of my #Choose30 Daily Challenge, I woke up at 7:25, walked my fur babies, showered, & dressed to my shoes. (Thanks, Flylady!)
  2. Worked on my daily Motivated Moms Planner.
  3. I finished a day’s worth of clerking assignments ahead of schedule!
  4. I cooked from my pantry for each meal.
  5. Read my daily devotional.
  6. I waked two miles.
    1. I read part of a new review book.

Today I saved:

  • I eat at home this evening for dinner, saving our family $6.95.
  • I scored a free 1-year subscription to Midwest Magazine, a savings of $16.00.
  • I recycled, upcycled, and composted one bins of deluge, and saved $0.25, the cost of 1 trash bag. 
  • I cooked three meals from my home pantry, saving $6.81 in the process.
  • My family drank water today, and saved $0.69, the cost of a 2-liter of soda.
  • I also did not watch cable tv, and saved $3.68 by doing so.
  • I earned $5.00 from Receipt Hog. 
  • I mailed off a package of coupons for Coups For Troops.

Total amount I saved my family: $45.38

This months savings goal remaining: +$73.95


Please be sure to check back tomorrow for another way to save for this months No-Spend Challenge! 

Here’s to saving,

mbnlogosm

August No Spend Month Challenge Day 19: How to Sell on Amazon.com

Day 19-


Hello again, savvy savers! I hope you all are well rested, and ready for a new daily challenge! By now, you’ve probably heard of, purchased from, or price matched by way of Amazon.com. It is currently the largest retailer in the world, and honestly one of my favorite shopping venues as not only to they sell everything under the sun, offer free shipping  with Amazon Prime, or on orders of $35.00 or more, they also do not charge sales tax! Woohoo! Amazon makes the act of shopping in your slippers, a state of mind! 

Moreover, the Amazon’s seller program, similar to Ebay, doesn’t offer auction-style selling, but instead offers sellers everyday items such as textbooks, books of all values, conditions, and print-type, dvd’s, music cd’s, collectibles, and more to a larger, more managed audience! One aspect of Amazon selling I like is the FBA (fulfillment by Amazon) shipment method, where you can send all your inventory to Amazon and let Amazon do the shipping for you; for those who frequent the post office, this can be a major time-saving system.

So, why Amazon? 

  1. Registering an account is free is you sell under 40 items per month; if you are selling more than 40 items per month, there is a monthly fee of $39.99.
  2. Simplicity: You can watch movies, listen to music, and then sell for profit, or Amazon gift cards, to buy more of what you want, or apply to monthly groceries, by way of Amazon Pantry and Amazon Subscribe & Save! 
  3. Extras: Somehow you ended up with two identical books/kitchen utensils/wall clocks. Rather than keep both, list one for sale.
  4. As a profit-driven venture: Thousands of businesses use the service to sell products.

What Can I sell:

  • Anything! Books, video games, movies, craft supplies, kitchen accessories, …the list goes on.
  • Keep in mind that some categories are off-limits, such as “adult products,” and if your item is on the off-limits list, you’ll be notified. 
  • An item may be in “acceptable”, “good”, “very good”, “like new” or “new” condition.
  • It’s a good idea to be honest about the condition, accurately describing it as best as you can.

How to Sell:

  1. Click here to sign in with your Amazon email address and password.
  2. Next, enter your legal name and read the “Agreement”. Accept the terms and select “Continue”.
  3. Add your credit card information: Amazon needs identity verification, so it asks for valid card information.
  4. Choose your “Display Name”, aka shop name. Enter your mailing address.
  5. On the next page, agree to be called or texted, as a  verification step.  A PIN will be provided, which you will need to enter before registration is complete.
  6. Congrats–you’re a registered Amazon seller! 
  7. If you have not already set-up two or more payment methods, on a buying account (one of which is a bank account), or if you have changed your payment method in the last 7 days, you will have an additional 7 day wait before payments are directed deposited into your bank account. 

How To List An Item For Sale:

  1. From the homepage of your Amazon seller account, go to “Add a Product” (in the lower left sidebar). This takes you to another page where you can see if the product is on Amazon already. If not, choose “create a new product”.
  2. List your item. Be sure to use a good quality stock photo, and then enter as much information about the product as possible. 
  3. Before you set a price, gauge how others have priced it based on the condition. If it’s priced too high, it probably won’t sell; if it’s price too low, then it will sell really fast but you won’t get as much as you potentially could have.
  4. Note that all shipping charges are preset. 
  5. You can also opt to have your items mailed to Amazon, who will mail them on your behalf.
  6. Amazon sends an email to you when a product sells.
  7. If you prefer to mail parcels yourself, try to ship the item–with signature confirmation/tracking– be sure to do so within 3 business days to keep your customer happy.
  8. Funds are deposited into your banking account on a scheduled basis.
  9. After items have been received for a full 3 business days, you can request buyers leave you a product review, and a sellers review, too!

Sellers Tips:

  • Fees are charged per sale.
  • Fees vary based on the category and the selling price.
  • Amazon deducts them from your balance. 
  • Always use USPS’s Media Mail option, for shipping heavy books.

 For me, as I already have a seasoned account, I listed ten items for sale.

My Selling Goals Were:

  • I am going to list 10 household items; 12 Blu-Ray Discs, and 10 PS3 Games.
  • I hope to make $100.00 in profit.
  • All items that do not sell will be donated to charity.
  • All items will be listed for one week.

As well today I was also able to accomplish:

  1. As part of my #Choose30 Daily Challenge, I woke up at 7:25, walked my fur babies, showered, & dressed to my shoes. (Thanks, Flylady!)
  2. Worked on my daily Motivated Moms Planner.
  3. I finished a day’s worth of clerking assignments ahead of schedule!
  4. I cooked from my pantry for each meal.
  5. Read my daily devotional.
  6. I waked two miles.

Today I saved:

  • I eat at home this evening for dinner, saving our family $6.95. 
  • I recycled, upcycled, and composted one bins of deluge, and saved $0.25, the cost of 1 trash bag. 
  • I cooked three meals from my home pantry, saving $6.81 in the process.
  • My family drank water today, and saved $0.69, the cost of a 2-liter of soda.
  • I also did not watch cable tv, and saved $3.68 by doing so.

Total amount I saved my family: $21.38

This months savings goal remaining: +$60.33

So today I challenge you to sell 10 items on Amazon.com! Moreover, do you already sell on Amazon? What has your experience been like? Leave a comment and let me know your thoughts! Be sure to come back this evening to see how my daily challenge went, as well as how I was able to additionally save around my home!

Please be sure to check back tomorrow for another way to save for this months No-Spend Challenge! 

Here’s to saving,

mbnlogosm

How To Become An At-Home Book Reviewer!

HappyMother's Day (2)


Hello again, savvy savers! If  a mug of soup, a cup of hot tea, and a great, new book sounds like your perfect night, than that makes two of us! If you are anything like me, than you are nothing short of a bibliophile! Well, you are in luck, as this weeks Tutorial Tuesday post centers around being able to score free books.


How can be score free books?

  1. You can become a book reviewer, with one of several dozen online book reviewer programs.
  2. The best part is that you do not need to be a designated book blogger, to be able to review books.
  3. You simply need to have a love of the written word, a social media following, and a verifiable mailing address.
  4. Each blogger will need to apply for book reviews, and just wait for the reviews to come in.
  5. Once your books are received (the books will generally be sent via UPS and FedEx for free), you will need to read the books within a 2-3 week time frame.
  6. After your books are read you will need to write a small, yet promising review online. 
  7. Keep in mind, you will need to keep reviews legal, by always disclosing your reviewer status. 
  8. Beyond this, you will need to review books online, as well as reviewing on an online purchasing outlet, such as Goodreads, Amazon, or Barnes & Noble. 
  9. Books once read are yours to keep!
  10. Also consider donating completed books, or to use them for giveaway materials for your blog!
  11. That’s it… easy peasy! 


Here are a list of Reviewer Programs:

BookSneeze:  They have both print and e-books available. Booksneeze sends out a monthly newsletter informing participants of the latest books available for review.  

Blogging for Books: This program is ran by Waterbrook Multnomah. It has a pretty simple sign-up and I like that they send out email notices monthly informing you of the different books they have available. 

Bethany House: Here is a link to the latest newsletter with the list of books available for review.

Tywebbin: Offers a quick simple sign-up to be host of one their virtual book tours. Books offered from this review program tend to be primarily African American books. 

Cross Focused Reviews: This program is a service of Cross Focused Media, LLC. Once you have signed up on their list, you will receive email notifications of available books on tour. 

TLC Book Tours:  Offers a quick sign up process to get on their list of tour hosts. 

Tyndale Blog Network: This program is hosted by Tyndale House publishers. Each month they send out a list of available books once you have been approved. 

NetGalley: This program offers books from a vast number of publishers. According to their website, “NetGalley is a service to promote and publicize forthcoming titles to readers of influence. 

The B& B Media: I have done several reviews through this program. Once you’re on their distribution list, you receive an email notification of available books they have and you simply fill out the form to be a part of that book’s tour. They give you a date the review must be posted by.

Tips for Reviewing:

  • This list provides a great start for book lovers and bloggers alike, that are looking to review books.
  • Each program offers free books in exchange for an honest review and have their own requirements about review length and where you must publish your reviews.  
  • Remember to disclose your reviewer status online, per 2013 FTC regulation.
  • Pick books in your genre of choice.
  • Have fun!

It also goes without saying that to be a book reviewer, after you start getting books, it can be hard to keep track of who sent them to you. Right now, I have a pile of books sent to me by publicists, authors, and book review sites making sure to:

  • Creating a spreadsheet of all books received allows you to track titles, websites, dates you received the book, and the deadline you need to meet.
  • Trust me, you’ll want to do this from the beginning.
  • You’ll also want to carve out time to read the books. Don’t let them just sit on your nightstand. Read away!


So, today I challenge you look into saving on your monthly book purchasing costs, by becoming a book reviewer!


Here’s to saving,

mbnlogosm

Non-Food Items To Freeze To Save Money!

download (1)


Hello again, savvy savers! If your anything like me, you are always on the lookout for new ways to save! Today finds us with a new list of things I am currently freezing, all non-food items, to save money in 2015:

Pantyhose: Frozen pantyhose are less likely to develop runs as you are putting them on. The fibers are constricted by the cold and more resistant to handling, which is how many runs occur. Store your hose in the freezer until right before you need to wear a pair, and save $3-$10 a pair, by prolonging the life of your hose!

Batteries:  All batteries can be helped by being placed in the freezer, especially rechargeable batteries, as their nickel-metal hydroxide can expect to see a life expectancy extension of 90% or greater! So be sure to store your batteries in the freezer until you need to use them. 

Seeds:  Seeds stay fresher in a frozen state and often will germinate more effectively after being frozen; please click here to see my seed store post!

Candles: Candles actually burn better, and for longer, if they are lit after being frozen, especially soy and beeswax candles. Store your candles in the freezer until you want to use them. If you will not use them for some time after a special occasion, place them back in the freezer until the next use. The thicker the candle width, the more freezing will extend burning life.

Moisturizers: Keep eye, face, and neck creams and moisturizers in the freezer. Remove them to get what you need, then place them back inside. Your creams and moisturizers last longer and work more effectively, for up to five years.

Dust Mites:  If you or someone in your family has a dust mite allergy, put pillows, curtains, small rugs, pillowslips, stuffed animals, linens and other small mite-infested items into sealed plastic bags and then into the freezer for at least 24 hours, will kill those pesky little buggers. If your child has lice, you can put no-wash items in the freezer to kill the lice. 

Denim: Don’t wash your raw, dark rinse denim pants, and instead freeze them for twenty-four hours to kill any bacteria or mites just as well as washing them can.

Hard Drives: If you experience a hard drive crash, place the hard drive into a sealed plastic bag, then place it in the freezer for 5 hours. Remove, replace, restart your computer and quickly back up your data; the low freezer temperatures allow heat damaged files to be accessed, only until the drives come to room temperature. 

Sealed Envelopes: If you need to re-open sealed envelopes, place the sealed envelope in the freezer for about 10 minutes. Then gently insert your finger beneath a corner of the seal and open it. This method also allows stamps to be removed from mail, too! 

Here’s to saving,

mbnlogosm

No Spend Month Challenge Day 18: How to Sell on eBay!

Day 18-


Hello again, savvy savers! A new day, a new daily challenge, as part of our No-Spend Month Challenge!

So as this week we will be focusing on selling the items we cleared out of our home last week, today I want to focus on eBay sales!

So why eBay?

  • eBay is a popular shopping website where individuals and businesses can buy and sell new and second-hand items. 
You’ll need:
  • a computer with an internet connection
  • a credit or debit card.

PicMonkey Collage

Here’s how to start selling on eBay:
  1. Go to the eBay website.
  2. You can only buy or sell on eBay if you’re registered, so if you don’t have an account, now is the time to create one. If you’re new to eBay, click register above the eBay logo.
  3. If you’re already registered, click Sign in, enter your user ID, then your password, and you will be logged in; you can then skip to Step 5. 
  4. To register, you’ll need to fill out details such as your name, email address and chosen password.
  5. Click the blue Submit button at the bottom of the screen.
  6. A confirmation email will be mailed to you.
  7. Check for this email.
  8. Click Continue if you are happy to proceed, within the email prompts. 
  9. You will be taken back to the eBay homepage, and your seller account is completed!

How To List An Item For Sale:

  1. Click on Sell at the top of the screen, and a ‘Update your information’ page will open.
  2. Complete your address information and click Continue.
  3. You will now be taken to a new page where you can start to list your item for sale. 
  4. Type the name of the item you want to sell in the box provided and click Get started.
  5. A new page will open with step-by-step instructions on how to create your listing, including how to give your item a clear, specific title and how to upload a photo.
  6. It will also show you how much money it will cost to list your item; these fees will be added to your sellers account, payable monthly.
  7.  Once you’ve filled in all the details for your listing, click List with displayed fees at the bottom of the screen.
  8.  A new page will open. Here you’ll see how your listing will look before it’s posted on eBay.
  9. Click Continue if you’re happy with the way it looks.

How To Edit A Sale Listing:

  1. Click Edit listing if you want to make any changes.
  2. A new page will open asking you for extra information. Click Continue.
  3. Review your account information, check the box and click Continue if it is correct. 
  4.  eBay will then verify your information.
  5. You will then be asked to verify your phone number. Click the Call me now button and an automated service will call to give you your PIN. Once you have this, enter it into the PIN field and click Continue.
  6. You will then need to log back in. 
  7. When you sell items on eBay, the website charges a small fee. You now need to choose how you will pay any fees. Select the payment type you wish to use; credit card or paypal, and continue.
  8. If you chose to pay via PayPal, you will now need to agree to the PayPal user agreement. When you have read it, click I agree.
  9. A new page will open giving you the chance to review your listing again. 
  10.  Your item is now posted!

A few tips:

  • Start with no more than 10 items; this will lessen your chance of any listings being reviewed by bots.
  • Click Track your listing in My eBay to see if anyone is bidding for or buying your item.
  • You can also click My eBay at the top of the screen at any time to look at these details.
  • Potential buyers may ask you questions about your item via email, so answer them promptly to ensure you get good feedback later.
  • You may receive haggle offers, but you are not forced to accept any offer.

When an item sells:

  •  When your item is sold, you’ll receive an email from eBay.
  • Go back to ‘My eBay’ and click Sold.
  • There you’ll see the name of your item as well as the price it sold for.
  • Click Send payment details to send your buyer an invoice, which PayPal prepares automatically if you’re using that method of payment.
  •  Once the payment has been received, you’ll receive an email from PayPal.
  • Go to the PayPal website and enter your email address and password to log in to your PayPal account. 
  • Always promptly mail parcels, as soon as possible.
  • Always mail items with SIGNATURE CONFIRMATION delivery options; this avoid people charging back offers for non-receipt of items, once you’ve mailed a parcel.
  • Always offer a “no-refund” policy, except if an item is grossly misrepresented, and list items as no-shipping refunds, no return refunds, too; this prevents mailing scam issues.
  • Always list shipping tracking numbers on both eBay and Paypay.

So, that’s it. That’s how to successfully sell on eBay! So, naturally… today I challenge you to:

  1. Crate an eBay/Paypal account.
  2. List 10 items.
  3. Have fun selling!

So, be sure to check back tonight for a recap of today’s challenge!

Here’s to saving,

mbnlogosm

Battle of the Bulge: Budget-Style: DIY Home Gym!

Battle of the Bulge, Budget-Style!

Hello again, savvy savers! It’s time again for another Battle Of  The Bulge, Budget-Style post!

As always, this series will focusing on ways to live a healthier, more active lifestyle while be able to afford clean, organic, obtainable foods! I believe this series can be worthwhile for many, who like myself, wish to get more in shape, not through crash-dieting but by small attainable lifestyle changes! With that said, here is where I am currently: I have a family history of high blood pressure, diabetes, and cancer. I am looking to lose 60lbs., find affordable non-gym membership options for working out, and change the way I consume food; this includes meals, snacks, and splurges!


Here’s where I am today:

  • I am 32 years young
  • 5’6”,
  • Weight 191 lbs; I am down two pounds since last week.

Ways I’ve used to workout this past week:

  • I walk my dogs.
  • Continued yoga and meditation.
  • Using a pedometer
  • Portioning my meals
  • Measure myself monthly using seamstress tape


So for those who may know know, I used to be in shape. I played tennis, took jazz, ballet lessons, and would walk for miles on end at the beach. That, of course, was then. That was before life piled up. A decade of graduations, working, saving, relocating, marrying, and general laziness began to take its toll, on my health and life. 

As the years wore on into my twenties, exercise became less important, less frequent. Injuries began to take their toll, starting with my ankle, then a diabetes diagnosis, and further limiting my activity, working from a home office upwards of twelve hours a day. The predictable result is that today I am but a shadow—a soft, blurry-edged, crusty shadow—of my 120-lb tones, svelte frame of yore.

While I’ve made my peace with my life-work-toil life at home, the overall dénouement of hitting the big 3-0 and beyond, occasionally when Facebook posts photos of “this was your life, many moons ago” wall posts, I can’t help wondering: What went wrong?

So, just this last month, during DH and myself’s weekly to-do chat, we decided to set up a home gym, in what was formerly my home office.

So, the idea of a home gym intrigued me. I know myself, I loath working out in front of others. So if I could in some small way both turn back the clock just a bit on my health, it would be worth it. But what would it take? How much would it cost? And where would I even start? 

As a savvy saver I know that it’s universally know that the best time of year to buy workout equipment is in the quarter post-Christmas, when stores are trying to cash in on consumer self-inflicted New Year’s weight lose resolutions, but I needed a home gym today, post-haste!  I also didn’t want to re-create my grandmothers, 1990’s fossilized, cliché home gym equipped with a dusty elliptical trainer, sit up machine, and every as-seen-on-tv unit money could afford! So, one thing was for sure, this would be a  gym-on-a-dime operation. 


So, here are the steps I’ve used to help implement my new home gym:

1) A Room with a View:  It’s hard to get a workout in when you’re beset by screaming kids or overflowing laundry hampers.  You want a dedicated room with a door that you can close off from the rest of your home, so your workout isn’t interrupted.

2) Accessories: To make my room more inviting I’ve planned to add a full length mirror to a door, to self-monitor my progress, and have wifi speakers put in to focus on my workouts and not the rest of my home. 

3) Think small: All you truly need is a smaller room, with adequate lighting, and cleared space. In my workout room, I have nearly floor length windows for lighting, foam gym mat packs ($20.98 from Sam’s Club, which covers 24 square feet, per pack) for flooring, neutral colored walls, mini blinds,and that’s it for space customization’s. 

4) Time: Consider the realistic amount of time you will actually use your gym. Are you going to work out for an hour a day, occasional training, or a set regime every few days. I plan to immolate a core training circuit; a 30-Minute daily, morning (between 6-7 am) Research-Based Workout Exercise system. 

5) What Are You Training For? Okay, you’ve got your space, with or without mirrors, stereo, and floor mat. What about the actual exercise equipment? What you buy should depends on your objectives—weight loss, cardio fitness, strength training, or some combination thereof—but it’s not quite as simple as that. You will also need pieces to help with weight lose plateaus, such as Pilates, jump ropes, etc. as after three weeks or so your body adjusts and you stop losing weight. A general rule of thumbs is a combination of cardio and resistance training is best for weight loss and overall fitness—even though that message itself is sometimes resisted. Especially for women, the above mentioned extras will help with what we need most, toning. 

6) Dumb and Dumber:  As my husband, a former US Army Sargent advised me early on, every home gym must be equipped with a full set of dumbbells and kettle-bells. Shop for the three weights you think you’ll use most often,  5, 10 and 15 lb bells for women. What’s nice, is that each piece can be purchased for under $7.00 each at mass retailers. Also, dumbbells store easily, on a small table or bench, and with the right glute and leg exercises, you will not need to purchase expensive rowing or leg machines for your home gym. 

7) Second hand first: So, first thing is first, you need a home gym budget. After my husband and I settled on having a $500.00 home gym budget, we planned to purchase mostly, second hand equipment for our home gym. Thus far we have found an elliptical on a local Facebook group for $20.00, a stationary bike for $10.00, and free jump ropes, resistance bands, yoga ball, and dumbbell bench. We still plan to buy a treadmill, weight bench, and finish outfitting out dumbbell and kettle bells. Also consider looking at Freecycle, Craigslist, and Penny Savers for additional sources of gym equipment. 

8) Think outside the gym: In order to help me with one of my more pressing issues, poor posture, I plan to invest in a stability ball as a replacement for my home office chair. What’s nice about this option, is that for under $30.00 online, this call will allow you to do abdominal crunches, squats, hamstring curls, body bridges, as well as preform basic office functions, too!

So, there are my plans and tips for starting a home gym at home. If any of my readers have a gym at home already, and have some tips for revamping my above mentioned plans, I’d love to hear about them.

Here’s to your health,

mbnlogosm


Meal Plan Monday (8/17-8/23/15)

LESSONS


Happy Monday, savvy savers! This week is starting off to a sunny, and not-so humid start here in Dixie. This weeks menu is going to be a little different, as it will consist of consist of not only Cupboard Clearing ideas, but we will be “rolling one meat,” smoked chicken breast, from one meal to the next! Please note, the chicken being “rolled” in this weeks menu is Tyson frozen, boneless, skinless chicken breast 6 lb. packs, purchased at Sam’s Club last month for $3.50 each; this was part of a Plus Members monthly savings program deal. The cost of this weekly menu is only $19.56, and it feeds a family of four.


Here’s what we purchased this week:


unnamed (3)

Winn-Dixie:

  • 4 Jumex Juices, $0.49 each
  • Candied Orange & Lemon Peel Tubs, $0.25 each
  • Ripe Banana Bags, 2/lb for $0.39
  • 2 Marshmallow Fluff Cups, $0.39 each
  • (2) 1-Liter Coke Bottles, $0.99 each; Submitted for a $1.00 iBotta App, and only paid $0.50 after rebates
  • 2 Zapp’s Chips, 2/$2.00
  • 2 lb bag of Cabbage, $0.49/lb
  • 3 bags of Yaki Nori, $1.00 each
  • Tomato, $0.89 each; submitted for $0.25 Checkout51 Credit
  • 2 cloves garlic, 2/$1.00
  • 2 Tubs Move Over Butter, $1.19 each
  • 1 Quart Fat Free Land-O-Lakes Hal and Half, $1.39
  • 1 cucumber $0.50; submitted for SavingStar 20% back credit
  • 1 Box of Jiffy Corn Bread Mix, $1.19; submitted for full rebate back on SavingStar
  • 3 pound bag of Bolthouse Carrots, $1.29
  • EarthBound Farms Salad Tub, $3.99; used $1.00 Earthbound Farms Coupon

This weeks shopping total was: $20.76 for $81.23 worth of groceries; I paid with a gifted American Express gift card, to stay within the No-Spend Month guidelines.


START (1)


Monday
Breakfast: Strawberry, blueberry, and Almond Milk Smoothies.
Lunch: Almonds, celery, carrot sticks, and Crystal Light.
Snack: Almonds, and Gala Apple Slices.
Dinner: Smoked chicken breast wraps, with Roma mottoes, spinach, feta, and Greek dressing; served with with Diet Cola.
Dessert: Sugar-Free Dulce de Leche pudding cups, with strawberries.

Tuesday
Breakfast: Cereal, with Almond milk.
Lunch: Chicken taco roll-ups; in lieu of taco shells I use Romaine Lettuce Sheets; served with crystal light.
Snack: Strawberries and String Cheese.
Dinner: Freezer Cooking Chicken and Dumplings (modified using smoked chicken); served with steamed broccoli and Crystal Light.
Dessert: Gluten-Free Brownies.

Wednesday
Breakfast: Baked Frittata Cups (chicken substituted for sausage); served with Almond Milk.
Lunch: Chicken salad, with walnuts and grapes; served with diet cola.
Snack: Grapes and string cheese.
Dinner: Crockpot Chicken Curry; steamed peas, steamed rice, and crystal light.
Dessert:  Gluten-Free brownie sugar-free ice cream sandwhiches.

Thursday
Breakfast: Homemade Greek Yogurt topped with Strawberries; served with Unsweetened Almond milk.
Lunch: Chicken salad, with walnuts and grapes; served with diet cola.
Snack: Almonds, and Gala Apple Slices.
Dinner: Stuffed smoked chicken breast sandwiches (breasts split open, stuffed with sliced provolone cheese single, and grilled); served with sweet Potato Fries and Crystal Light.
Dessert: Brownie flurries with leftover brownies.

Friday
Breakfast: Baked Frittata Cups (chicken substituted for sausage); served with Almond Milk.
Lunch: Chicken taco roll-ups; in lieu of taco shells I use Romaine Lettuce Sheets; served with crystal light.
Snack: Strawberries and two pieces of Sugar Free Chocolate; candy is used as melted drizzle for berries.
Dinner: Crockpot Orange Chicken with Almonds, Steamed Peas, and crystal light.
Dessert: Diet Coca-Cola slushies.

Saturday
Breakfast: Cereal, with Almond milk.
Lunch: Crockpot Orange Chicken with Almonds, Steamed Peas, and crystal light.
Snacks: String Cheese and grapes.
Dinner: Chicken mole; served with steamed rice, corn, and Crystal Light.
Dessert: Sugar-Free Dulce de Leche Cups.

Sunday
Breakfast: Homemade Greek Yogurt topped with Strawberries; served with Unsweetened Almond milk.
Lunch: Stuffed smoked chicken breast sandwiches; served with sweet Potato Fries and Crystal Light.
Snack: Almonds, and Gala Apple Slices.
Dinner: Chicken mole; served with steamed rice, corn, and Crystal Light.
Dessert: Diet Coca-Cola slushies.


START


This weeks Sunday prep:

  1. This week I wanted to make room in my deep freeze for a cyclical end-of-summer sale on corn, squash, and bell peppers (which will go on sale at the end of August). So,  I set out to make several new crockpot-ready freezer meals, made from stockpiled veggies, pork roast, and chicken breasts already on hand.
  2.  I prepped three meals; Chicken Curry, BBQ Chicken, and Cranberry Pork Roast
  3. Also, prepping a weeks worth of breakfasts and lunches on Sunday’s,  can be another way save a half hour of time each day time during the week for yourselves; I also find that this helps with my diet as having prepped snacks, ready and on hand, deters me from reaching for not-so-healthy options. 
  4. I checked out this weeks sales ads, and made a shopping list accordingly; this also includes adding, sorting, and organizing coupons too!


So, that’s what we will be having this week. I’d love to hear what’s on your menu as well!

Here’s to Monday meals, 

mbnlogosm